Summer holidays activities - craft ideas - felt flower posy

We know that this summer is likely to be challenging for many of us, who won't be heading off on holiday and have kids to entertain. With this in mind, we are launching a new series of children’s craft activity posts.

Every month, we will be featuring a simple project, suitable for children between the ages of seven and 12. We’ll tell you exactly what materials you will need, and we’ll give you simple, step-by-step instructions, along with pictures, to show you how to create it.
Let’s get started with this month’s craft. We wanted something bright and beautiful to begin with, so we are delighted that 8-year old Amelia is here to show us how to make this cheerful felt flower posy!
What you’ll need...
You should be able to find all these things in craft shops or the craft sections of high street shops and supermarkets.
-
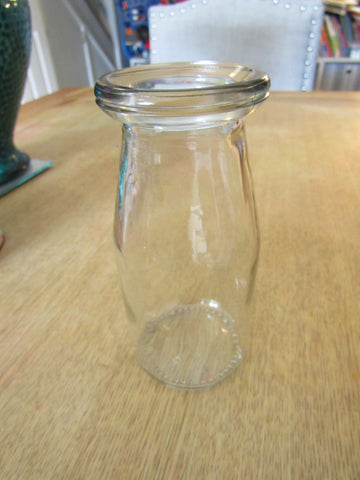
A glass bottle or jar
 This can be any size you like. You can use a clean milk bottle or a jam jar etc.
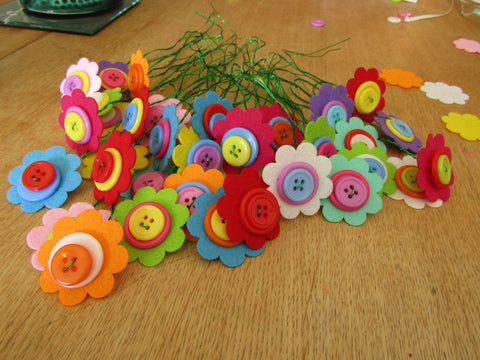
- Felt flowers

- You can buy pre-cut flowers, or buy sheets of felt, and cut out your own. You can use whatever colours you like, but we think the finished bunch looks best when there are lots of different ones!
- Each flower will need to have two small holes in the middle, for the wire stem to go through. You can use a well-sharpened pencil to do this, but ask an adult to help you, if necessary.
- How many flowers you will need depends on the size of the bottle you choose. We’d suggest making about 20 to start with and then adding more if you want a bigger bunch.
Large and small buttons

These should be smaller than your felt flowers. Again, the colours are up to you, but we love having a variety!

You’ll need lengths of wire to make the stems of your flowers. Amelia used green wire but as most of it will be hidden in the bottle, it doesn’t really matter if you use another colour!
What length of wire do you need?
The minimum length of wire you will need for each flower can be worked out like this:
- Measure the length of your bottle.
- Multiply that measurement by two (as you’re going to bend each piece in half and twist it together) and add 2cm to the total, so that your flower heads will sit above the top of your bottle.
(For example: if your bottle is 10cm high, your wire should be approximately 22cm long: 10cm x 2, plus 2cm).
To make your posy look even better you might want to give some of the flowers longer stems than that, so they stand higher in the vase.
If you can’t find wire pre-cut to the right lengths, you can buy a roll of wire instead, and cut it yourself. You’ll need sharp scissors for this, so please be careful, and watch out for the sharp ends of the wire. Get an adult to help you with this bit, if necessary!

- Coloured string

This is to decorate your bottle. You could also use strips of paper or material, ribbon, pipecleaners, or stickers...whatever you like!
To make the flower posy:
- Take a felt flower shape and push the end of one piece of wire through one of the holes.

- Push that same end of the wire through one hole in a large button, going through the back of the button to the front. Then do the same through a small button. Both buttons should end up sitting on the felt flower.
3. Move all three to the middle of the wire, then bend the wire and push the same end back through a second hole in the top small button. Keep going through the large button and finally back through the second hole of the felt. Your flower should now look like this:

4. Turn your flower over, and twist the two ends of the wire together tightly, to form the stem.
5. Repeat steps 1 to 4 until you have all the flowers you need!

To make the vase:
-
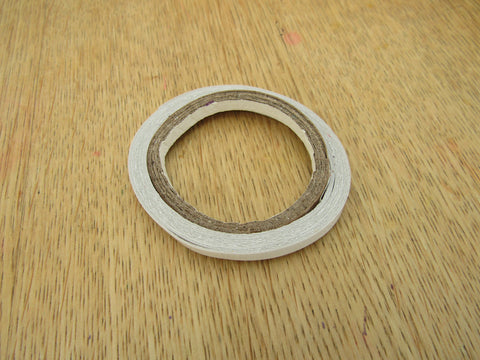
Take your glass bottle and, starting at the bottom, cover it all with double-sided sticky tape, circling up the bottle as you go.

- Once you’ve covered the whole bottle with tape, peel the top layer off, so the sticky part is exposed.
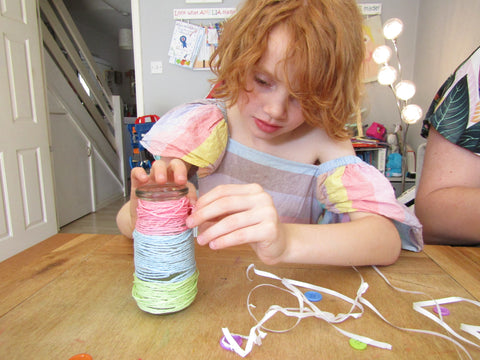
- Take the end of your string and press it onto the sticky tape: it doesn’t matter whether you start at the bottom or the top. Slowly start winding the string around the bottle: you can stick to one colour, or change it for a


rainbow effect!
Finishing your felt flower posy:
Once you’ve made all your flowers and decorated your vase, it’s time to put it all together.
Put the flowers into the vase one at a time so the wires don’t get tangled together. Try and arrange them so there are no big gaps in the display.
And that’s it! You should now have something that looks like this:

Amelia says: “It was really fun! I would recommend it as a craft for others to do.”
If you decide to make a felt flower posy, we’d love to see it: post your pictures on Facebook and Instagram and tag us!
And don’t forget to check our blog each month for more craft activities.


