Katie Tyndale·
Easter craft project - Lollipop Easter Basket

Katie Tyndale·
Summer Star Fish Project by Amelia
Katie Tyndale·
Cute pom pom pumpkins!
The high-point of every October is always Halloween: a time of spooks and skeletons, ghosts and ghouls, witches and warlocks.
One of our favourite sights as it gets dark is pumpkins with candles inside: big or small, smiley or scary, they’re the perfect welcome for any visiting trick or treaters. However, they can be quite tricky to carve, so Amelia is back with some that are much less messy to make!
See how you get on with these cute pom pom pumpkins!

What you’ll need:
You should be able to find all these things in craft shops or the craft sections of high street shops and supermarkets.
- Orange wool

- Rectangular piece of card

The piece Amelia used was 20cm x 10cm, but you can try different measurments to make different size pumpkins!
- Green Felt

-
A Stick

You can use all sorts of things for the stem of the pumpkin: Amelia chose to use a wooden kebab skewer, but you could use a twig from your garden or a lolly stick, if you want.
You’ll need to cut off a piece that’s about 3 or 4cm long: if this is too difficult with scissors, ask an adult to cut it for you, using secateurs.
-
Scissors

- Glue

Amelia used a glue gun, but you can also use PVA glue. Stick glues may not be strong enough for this!
To make your pom pom pumpkins:
- Take your piece of card and hold it so the long sides are horizontal, and the short sides are vertical. Wrap the wool around and around the card, from top to bottom, until it is completely covered.

Amelia says: “I wrapped the wool around the card about 50 times, but you could do less for a thinner pumpkin, or more if you want a fatter one!”
- Carefully slide out the card from the wound wool, keeping the wool together in the same shape.

3. Then, cut another piece of wool, about 12 inches long, and tie it around the middle of your wool bundle, pulling it tightly together until it makes a round-ish shape, before knotting it together.

4. Using the scissors carefully (ask an adult for help if you need to), cut through all the loops you have made with your wool.

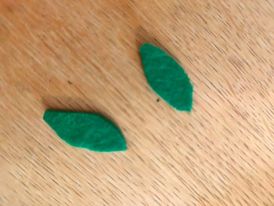
5. Take your green felt, and draw two leaf shapes on it.

6. Cut your leaves out.
7. Take the stick, or twig, that you have chosen for your pumpkin’s stem, and glue it to the top of your pumpkin. You might need to hold it there for a while, to make sure it sticks properly!
8. Once your pumpkin stem is in place, glue your leaves to it.
9. And that’s it!

(If you want to personalise your pumpkins even more, you could draw eyes, a nose and a mouth on some coloured card, cut them out and stick them on. Or how about some smiley face stickers, instead?!)
Amelia had so much fun constructing her pumpkins, she made LOTS!

Amelia says: “The pom poms were good fun to make, and I’m sure others will enjoy it as much as I did. It may seem a bit confusing at some points but the end result is amazing!”
Now it’s your turn! Post pictures of your pom pom pumpkins on Facebook or Instagram and tag us so we can see them too!
Make sure you check back here next month for another craft project. And to keep busy while you wait, why don’t you try making our paper plate fish, simple felt bookmark or felt flower posy?

Bold Support·
DIY Slime Kit
I had a friend come and visit with her eight year old and, while trying to catch up and drink a cuppa while it was still hot, we needed to find something to keep her (and a 13 year old) entertained! I dug out our Slime Factory Kit....... The kit has everything needed to make two different slimes - just add a bowl for mixing and I also put down a cloth to protect my table from staining as we used food colouring. The first method used guar gum and warm water mixed together making a slimy ball You can...
